What is Tanking walls?
Tanking walls is a method of waterproofing basement or below-ground-level walls to prevent water from seeping through and causing damage. Tanking is typically used in buildings where the foundation or basement walls are below the water table or are exposed to high levels of groundwater.
The tanking process involves applying a waterproof coating or membrane to the interior or exterior of the basement walls. This coating creates a barrier that prevents water from penetrating the walls and entering the building. The type of coating or membrane used depends on the specific needs of the building and the severity of the water problem.
There are several types of tanking systems available, including cementitious tanking, bituminous tanking, and cavity drain membrane tanking. Cementitious tanking involves applying a cement-based waterproofing slurry to the walls, while bituminous tanking uses a bitumen-based coating. Cavity drain membrane tanking involves installing a membrane system that creates a cavity between the wall and the membrane, allowing water to be directed away from the wall and into a drainage system. You can create tanking mixture using the following:
1 part Cement
4-5 part Plastering Sand
1 part Sika Waterproofer
Step-by-Step
Here are the general steps involved in tanking walls:
1. Assess the condition of the walls: Before beginning the tanking process, it is important to inspect the walls to identify any existing water damage or areas of weakness. This will help determine the appropriate type of tanking system to use.
2. Prepare the walls: The walls must be cleaned thoroughly to remove any dirt, debris, or loose material. Any cracks or holes in the walls should be repaired before tanking. The walls should also be levelled to ensure the tanking material adheres evenly.
3. Apply primer: A primer is applied to the walls to promote better adhesion of the tanking material. The type of primer used will depend on the type of tanking system being used.
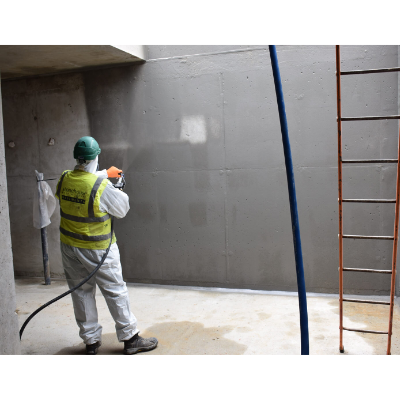
4. Apply the tanking material: The tanking material is applied to the walls using a brush, roller, or spray gun. The thickness of the tanking material will depend on the type of tanking system being used and the severity of the water problem. It is important to follow the manufacturer's instructions carefully.
5. Allow to dry: The tanking material must be allowed to dry completely before proceeding to the next step. The drying time will vary depending on the type of tanking system used and the temperature and humidity of the environment.
6. Install drainage system: In some cases, a drainage system may need to be installed to direct any water away from the walls. This could involve installing a sump pump or creating a channel to direct water to a drain.
7. Finish the walls: Once the tanking material has dried, the walls can be finished with plaster, drywall, or other materials to create a finished look.
It is important to note that the specific steps involved in tanking walls may vary depending on the type of tanking system being used and the specific needs of the building. It is recommended to consult with a professional waterproofing contractor to ensure the tanking process is done correctly and effectively.