What is Felt Roofing?
Felt roofing is a type of roofing material made from layers of felt, which is a fibrous material usually made from wool or polyester. The felt is impregnated with bitumen or asphalt to create a waterproof barrier. Felt roofing is often used for flat or low-pitched roofs, such as on garages, sheds, or small extensions.
Felt roofing can be installed in several different ways, including using adhesive, nails, or hot bitumen to bond the felt to the roof surface. The material is typically sold in rolls of various widths, and the layers are overlapped and sealed together to create a continuous, watertight surface.
Felt roofing is relatively inexpensive and easy to install, making it a popular choice for DIY projects. However, it typically has a shorter lifespan than other roofing materials such as shingles or metal roofing and may require more frequent maintenance or replacement.
Felt roofing is a good option for flat-roofed buildings in a range of sectors including residential and commercial projects, it can last anywhere between 20-30 years if done professionally and is completely weather and waterproof. A cost-effective solution to flat roofing. This method is for flat roofs (with a pitch over 20°).
step-by-step
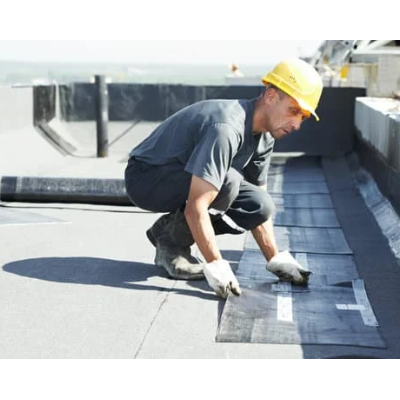
Installing felt roofing can be a complex process that requires careful preparation, attention to detail, and the use of specialized tools and materials. Here is a step-by-step guide to installing felt roofing:
1. Prepare the roof surface: The first step is to ensure that the roof surface is clean, dry, and free of any debris or loose material. Remove any old roofing material or nails, and repair any damage to the underlying roof structure.
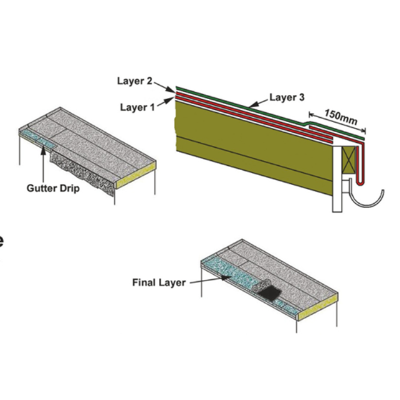
2. Install the drip edge: The drip edge is a metal flashing that is installed around the perimeter of the roof to prevent water from seeping under the felt. Install the drip edge using nails or screws, making sure it is level and secure.
3. Install the underlayment: The underlayment is a layer of felt that is installed over the entire roof surface. Begin at the bottom edge of the roof and work your way up, overlapping each row by about 2 inches. Secure the underlayment with nails or staples, making sure it is taut and free of wrinkles.
4 Install the felt: The felt is installed over the underlayment in the same manner, starting at the bottom and working your way up. Overlap each row by about 2 inches, and use a hot tar or adhesive to bond the felt to the underlayment and roof surface.
5. Cut around roof penetrations: Cut holes in the felt for any roof penetrations such as vents or chimneys, and secure the felt around these areas using a roofing sealant.
6. Install the final layer of felt: Once the main area of the roof is covered with felt, install a final layer of felt around the perimeter of the roof, overlapping the drip edge and securing it with nails or adhesive.
7. Install the roofing material: Once the felt is in place, you can install the final layer of roofing material such as shingles or metal roofing.
8. Finish the edges: Install metal flashing around the edges of the roof to seal the felt and provide a finished look.
It's important to note that the process of felt roofing installation may vary depending on the specific type of felt material and roofing system being used, as well as the size and complexity of the roof.
It's always recommended to follow the manufacturer's instructions and consult with a professional if you are unsure about any aspect of the installation process.